

Custom Window Light Sensor: Home Assistant + ESPHome + Adafruit TSL2591

In a few quick evenings, I built a custom light sensor for my smart home to measure outdoor light levels through my window. In this post, I’ll explain how I did it. We’ll go over the electronic components and wiring, enclosure, software configuration, Home Assistant integration, and a few example plots of the illuminance levels.
Introduction
Over the past many years, I have built numerous embedded systems projects. Some have made it onto this blog, for example, check out these project articles: thermostat, motor controller, LED driver, POV top, and LED display. One major theme emerges from all these embedded systems projects: I love to design my own custom circuit boards and architect the firmware/software which runs on them. There is such beauty in a minimal embedded system that has only the required hardware to do its dedicated task. No more, no less.
With the introduction of the Arduino platform in 2005, and many similar projects afterwards, e.g., platform.io and particle.io, the barrier of entry to embedded systems has reduced to nearly the likes of web development. Simply download the correct code development environment—nowadays, it might even be all in your browser on the cloud. Buy the development board and install the right open-source libraries for your project. Less than one hour later, you have a working prototype system!
This democratization of embedded systems over the past 20 years has hugely changed the aura of the craft. Now, almost anyone can build custom hardware systems designed for a specific application. Along with the rise of embedded systems engineers has been the “Internet of Things” (IoT), the concept of converting “dumb” devices into “smart” devices which can connect to the broader Internet. Whole companies exist which target building electronic chips and modules for the IoT world. For example, Silicon Labs has morphed in a pure-play IoT company over the past few years, recently completing the sell off of their legacy products to focus on IoT.
For me, these worlds of IoT and my passion for building custom embedded systems have collided. Enter the ESPHome open-source project.
ESPHome
ESPHome is an open-source project started back in 2018 which allows users to easily configure and build custom firmware to deploy onto ESP8266 and ESP32 devices. The ESP8266 and ESP32 devices come from a Chinese company called Espressif Systems, which was really the first company to introduce ultra-low-cost Wi-Fi module solutions. If you take apart almost any “smart” device you can buy today, you will probably find an ESP8266 module inside—they are ubiquitous in the IoT world.
The real power of ESPHome is the simplicity it offers. Imagine trying to build a simple system with a remote temperature sensor to record the climate inside your home, and an online dashboard to plot the data over time. I know first hard how hard this would be to do from scratch:
- Electronic component selection
- Circuit design
- PCB layout
- Fab house assembly of the PCB (or hand assembly)
- Low-level firmware driver development
- Application-level firmware design
- Embedded Internet Wi-Fi stack
- Local web server back-end
- Browser-based GUI for data visualization
As you progress through this list, you go from low-level engineers to high-level developers. The skill sets range from electrical engineering to computer engineering to computer science. It would take months if not years for a single hobbyist to create our hypothetical temperature monitoring system.
That is why I am so impressed with ESPHome. In literally a few hours, I went from nothing to a full working light sensor with local Wi-Fi integration and a data plotting dashboard via Home Assistant (all open-source projects). Incredible!
ESPHome is used to configure and build firmware for ESP-based processors without writing any code. Simply configure a .yaml file which describes the functionality of the widget. Then, ESPHome will auto-magically build the firmware binary and flash over-the-air (OTA) to the ESP device.
Home Assistant
Home Assistant is another open-source project from the same people who made ESPHome. It allows you to create home automation privately on your local network. There are no requirements for full Internet connection. Home Assistant allows all smart home devices to integrate together, regardless of the vendor. It is a vendor agnostic smart home solution. You can purchase commercial smart devices (e.g., smart light bulbs, sensors, etc) and they can join your Home Assistant ecosystem.
ESPHome is for those who want to build their own sensors and smart devices. You do not need to use ESPHome with Home Assistant or vice-versa; both can work as stand-alone projects. However, since the same people have built both projects, the integration between ESPHome and Home Assistant is amazing.
In the list above, the local web server back-end and browser-based GUI front-end are owned by Home Assistant, and the entire embedded systems part is owned by ESPHome.
Electronics
To make use of ESPHome, you need a supported processor: either the classic ESP8266 or the more powerful ESP32.
These are only a system-on-chip (SoC), so you will typically buy them on development boards that allow easy break-out of the pins and a USB interface.
There are numerous boards available, ranging in price from a few dollars to 10 dollars.
Next, you’ll need the actual application-specific device. Most sensors/widgets are available on small break-out boards from companies like Adafruit or Sparkfun. These break-out boards can be easily wired to the break-out pins on the ESP dev boards.
Components
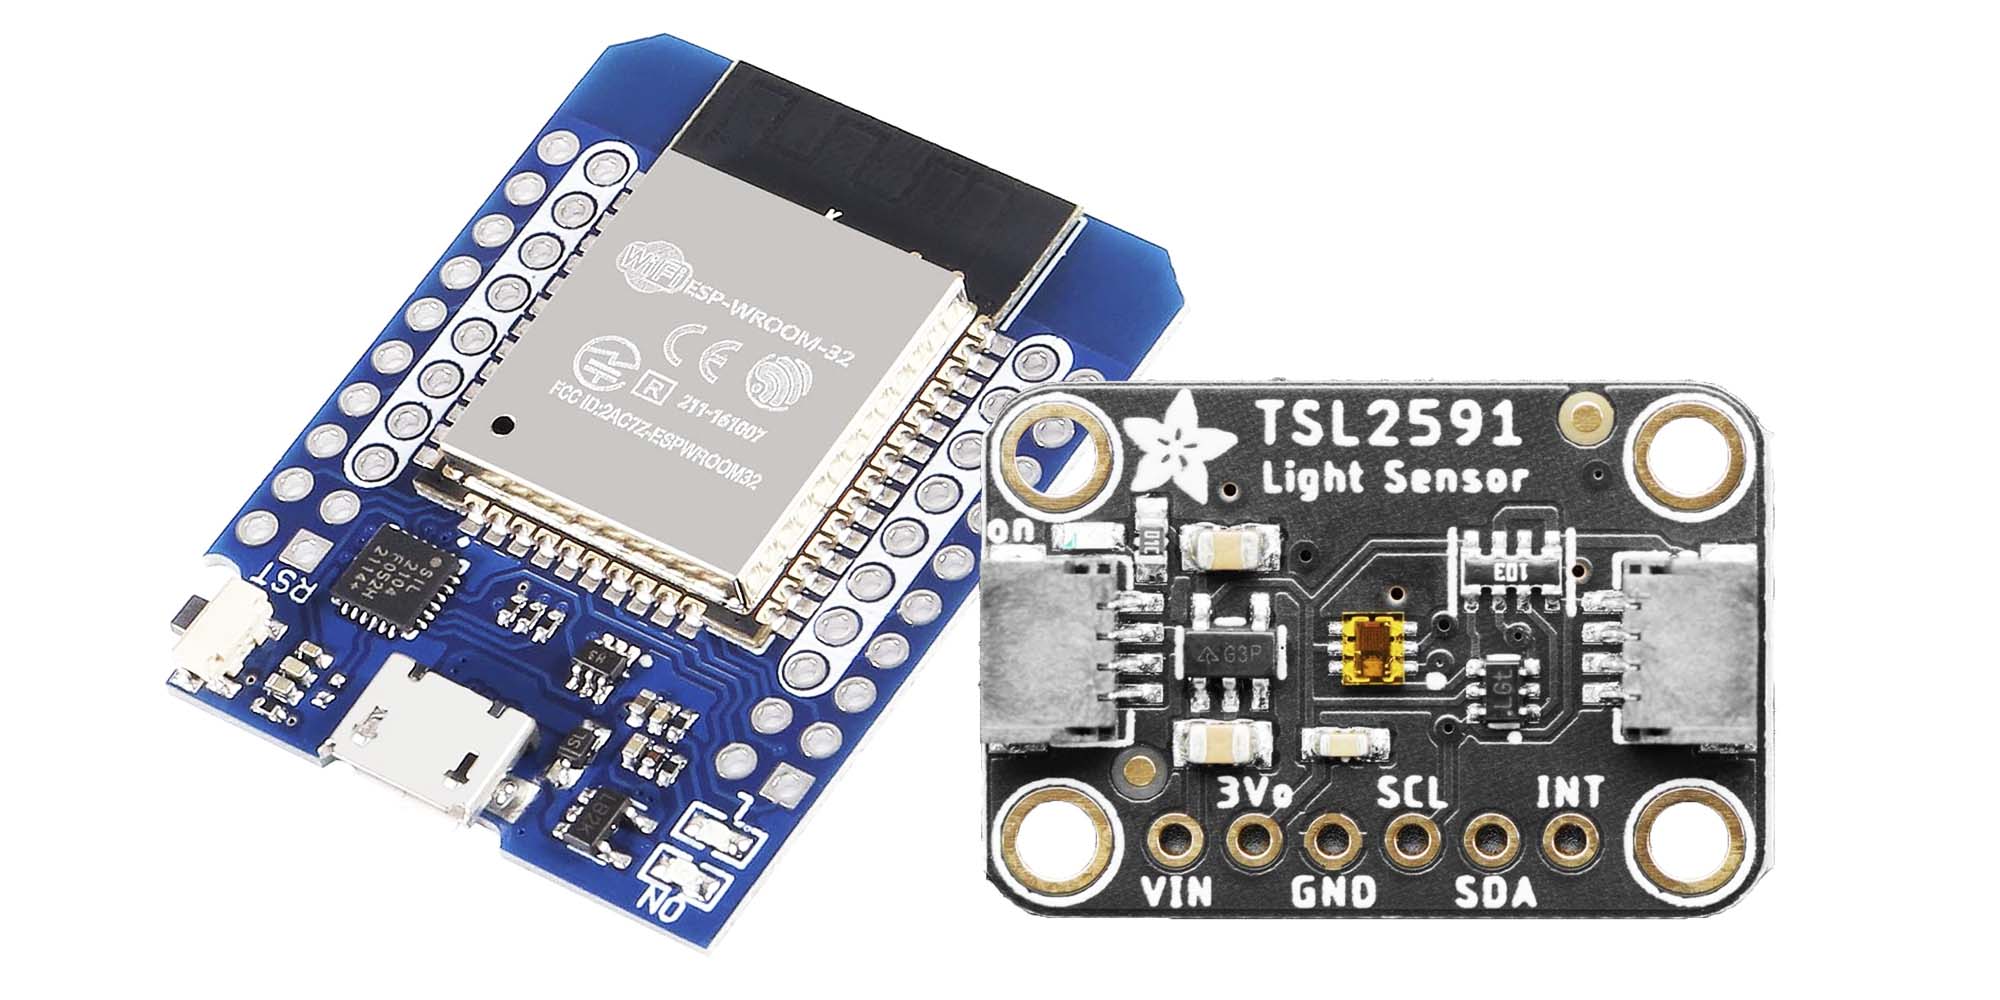
In this project, two boards were used (see picture above):
- ESP-WROOM-32 development board
- Adafruit TSL2591 break-out board
ESP-WROOM-32
The ESP-WROOM-32 module was selected for its low price in small quantities, and its broad support.
Its datasheet can be found here.
While I did not obtain mine from Adafruit, you can buy the bare module from Adafruit here. If you go this route, you’ll need to design a carrier board.
I did not do this; instead, I bought a breakout board from Amazon, see here.
Adafruit TSL2591 Sensor
This specific light sensor TSL2591 was selected since ESPHome already supported it: see the docs page.
ESPHome also supports a wide range of other light sensors: see list of supported light sensors.
However, even if it was not supported, the ESPHome code base is designed for easily adding custom sensors and the required low-level code to interface with them.
Plus, since it is open source, anyone can contribute more sensors!
For example, checkout these GitHub PRs where support for this specific sensor was added:
Thank you, @wjcarpenter. 😄
Wiring
The wiring between the ESP32 board and the TSL2591 board is quite simple since only power and the I2C interface is needed.
Four wires are required:
| Signal Name | ESP32 Pin | TSL2591 Pin |
|---|---|---|
5V |
VCC |
VIN |
GND |
GND |
GND |
I2C_SCL |
IO22 |
SCL |
I2C_SDA |
IO21 |
SDA |
Enclosure
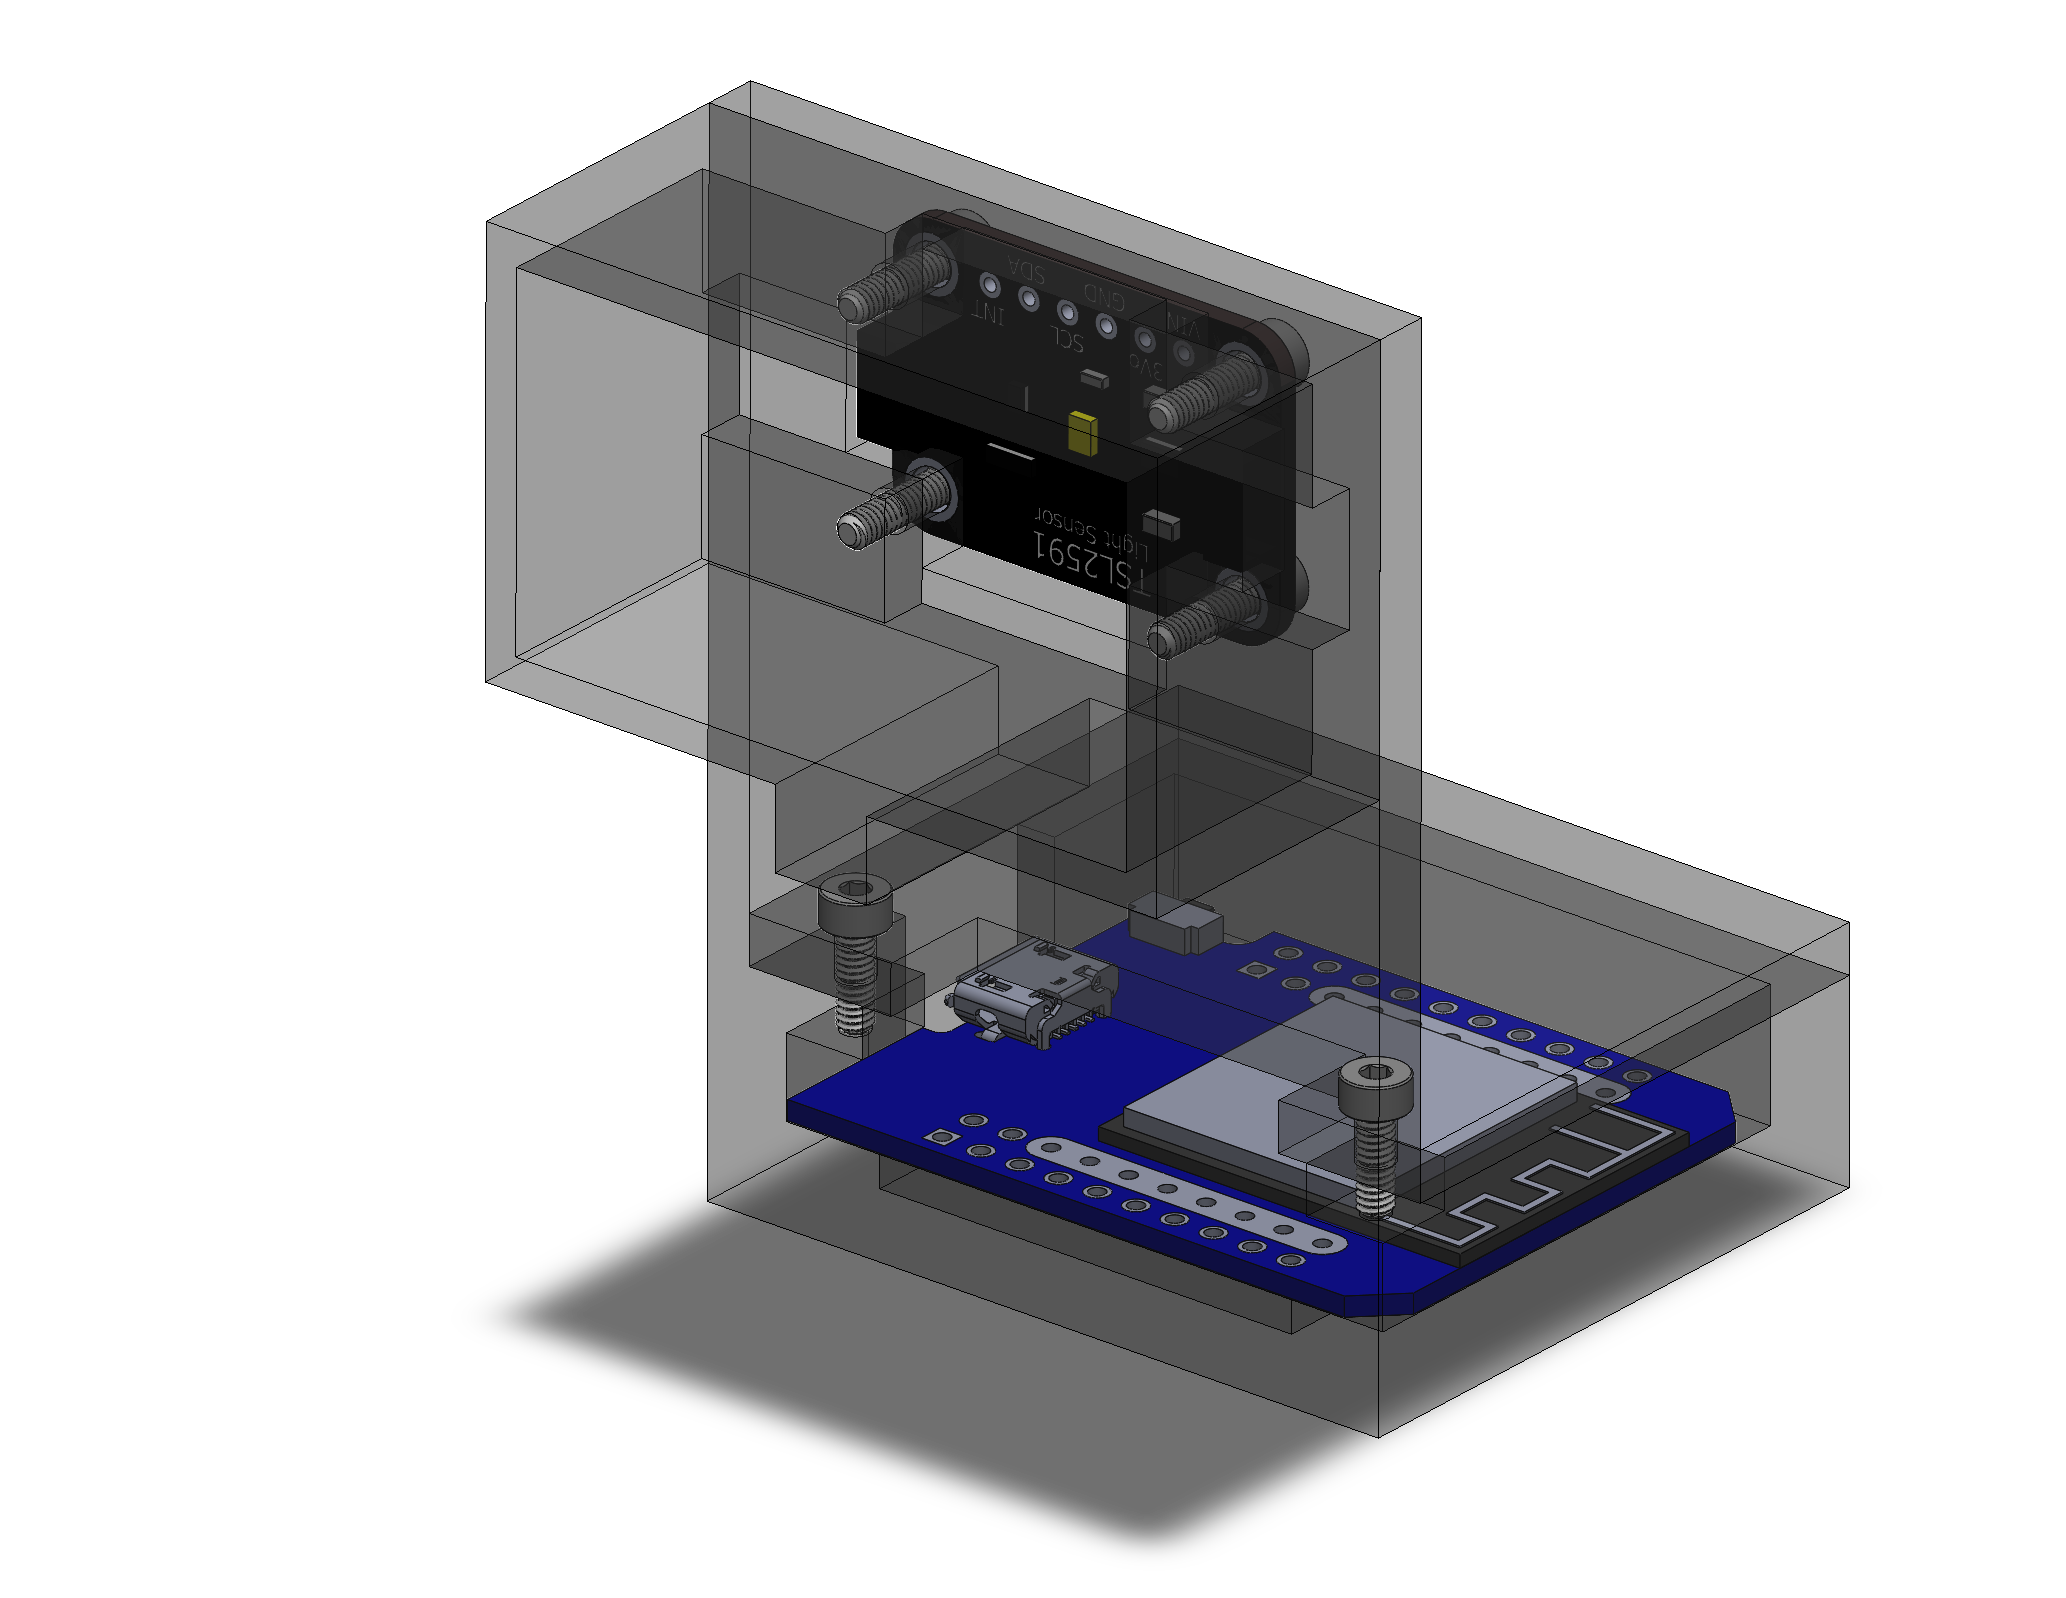
After soldering the four jumper wires to connect the two boards, I designed a 3-D printed enclosure to hold the light sensor against my window. For easy printing, I designed it into three distinct pieces which are attached together with small M2 screws.
Next, I used a 3-D printer to turn my vision of the enclosure into reality.
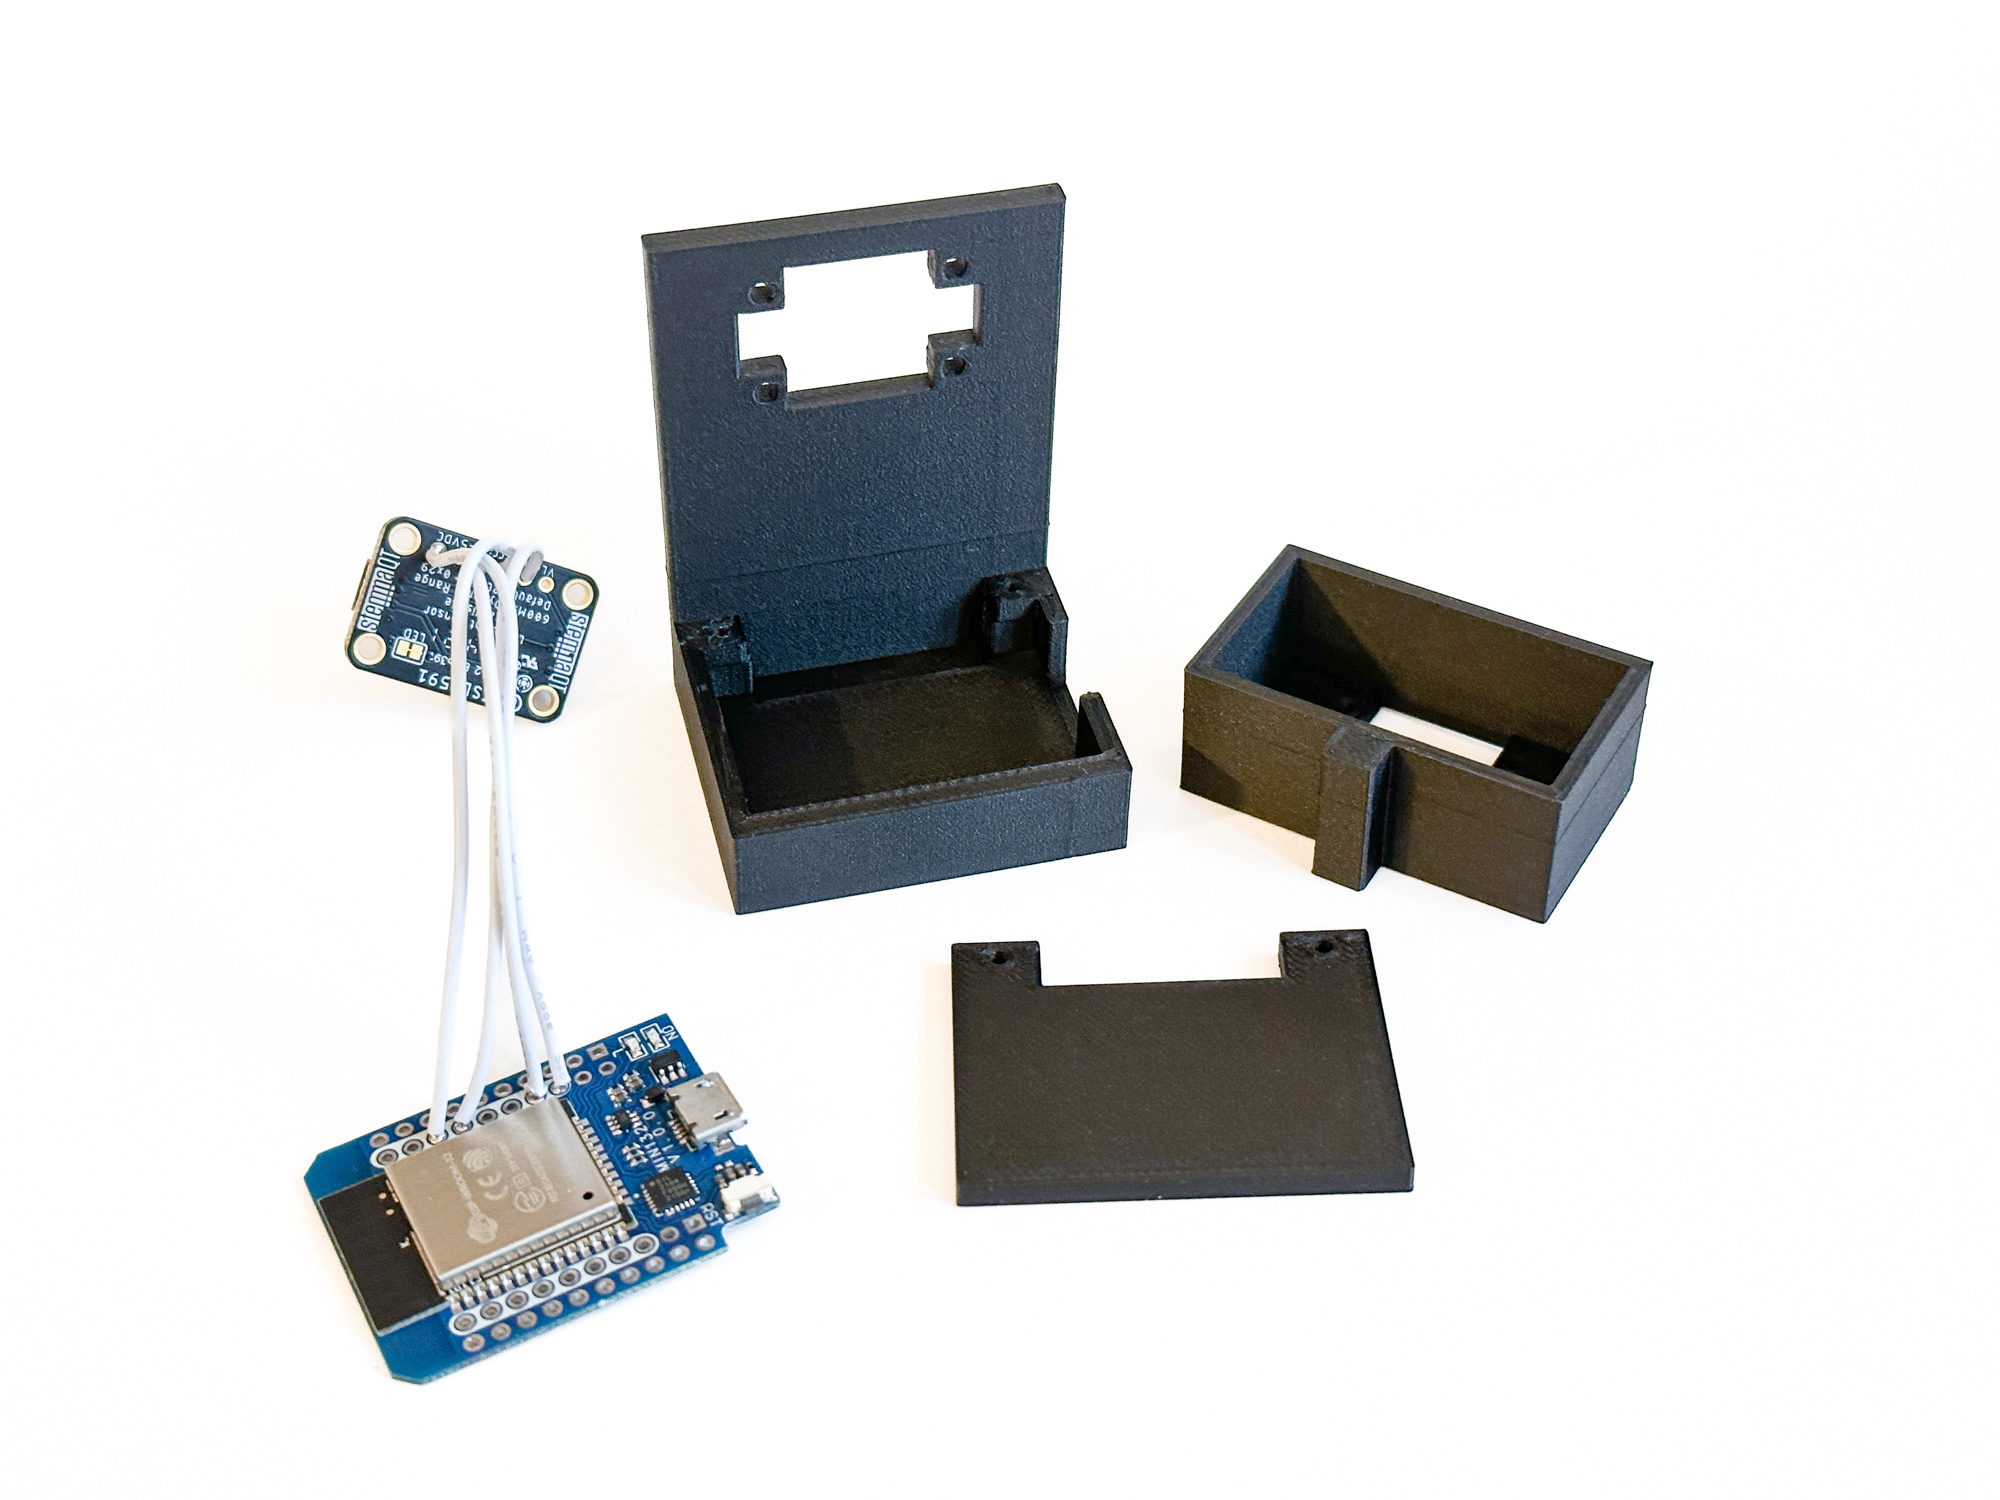
Luckily, it fit together the first try!
Software Configuration
To configure the ESP32 processor, I used ESPHome to build and flash (OTA) the firmware binary based on my application-specific config .yaml file.
To write this config file, I started with ESPHome’s getting started documentation, followed by the ESPHome documentation for the TSL2591 sensor.
esphome:
  name: light-sensor-1

esp32:
  board: wemos_d1_mini32
  framework:
    type: arduino

i2c:
  sda: 21
  scl: 22

sensor:
  - platform: tsl2591
    name: "TSL2591 Light Sensor"
    id: "light_sensor"
    address: 0x29
    integration_time: 600ms
    update_interval: 60s
    device_factor: 477
    glass_attenuation_factor: 7.7
    visible:
      name: "TSL2591 visible light"
    infrared:
      name: "TSL2591 infrared light"
    full_spectrum:
      name: "TSL2591 full spectrum light"
    calculated_lux:
      name: "TSL2591 lux"
Home Assistant Integration
Due to the powerful integration between ESPHome and Home Assistant, my custom device was immediately discovered by my Home Assistant server. Adding the light sensor to Home Assistant was a one-click one-minute ordeal. Awesome! 😄
Lux Calibration
The config file allows for user calibration of the computed lux value based on the device_factor and glass_attenuation_factor values, see the code for computing lux.
It appears that either value can be adjusted to calibrate the lux sensor output, but I figured the glass_attenuation_factor ought to remain the same per the same hardware sensor.
Instead, I changed device_factor parameter to tune the lux calculations.
Since I do not own a precise light meter to measure the “true” lux value, I used an iPhone app to calibrate the sensor.
This gets it in the right ballpark, which is all I need for my application.
Results
I let the sensor collect data and Home Assistant log it for a full day in Wisconsin, USA during the winter month of December. It was highly overcast with no visible sun.

Just as I expected, the lux values match the expected values, peaking around noon.
I plan on letting this light sensor collect data over the winter. Then, in the spring, I will pull all the data off of Home Assistant and post process it into a new blog post which aims to model my home’s heating efficiency. Stay tuned for more blog posts!
New Post Notifications
If you read this far, you might be interested in subscribing for email notifications about future new posts I write. I will never spam you! Every few months, I write a new article for this website, and will send you email about it. You can unsubscribe at any time. Thank you.